Category

Beauty

Category

Korean Skincare Routine for Beginners: Learn simple K-beauty steps, product tips, and daily habits for healthy, hydrated, glowing skin.

Can a simple skincare routine really make your skin look healthier and more radiant? Yes, and you do not need ten products to get started. A beginner Korean skincare routine focuses on gentle cleansing, hydration, targeted care, and daily sun protection. The goal is healthy, balanced, hydrated skin, not a complicated shelf full of products.

A Korean skincare routine for beginners usually includes cleansing, toner, essence, serum, moisturizer, and sunscreen. Start with a few gentle products, apply them from lightest to heaviest, and stay consistent for healthier, hydrated, glowing skin.

Peony Seoul’s beginner Korean skincare guide makes K-beauty easier to understand without overwhelming you with products. It focuses on simple steps that support hydration, comfort, and a healthy-looking glow. You can build your routine slowly based on your skin type and personal needs.

🌸 What Is Korean Skincare?

Korean skincare, often called K-beauty, is known for its focus on hydration and gentle skin care. Instead of chasing quick results, the approach encourages consistent daily habits. Many Korean beauty routines also focus on protecting the skin barrier and keeping skin comfortable. This makes the routine suitable for beginners who want a simple starting point.

The popular multi-step routine is flexible rather than mandatory. You can use three products or several products depending on your skin and goals. More steps do not automatically mean better results. Start with the basics and add products only when your skin needs them.

🧼 Step 1: Start With A Gentle Cleanser

Cleansing is the first important step in a beginner Korean skincare routine. A gentle cleanser removes sweat, dirt, excess oil, and leftover products without making your skin feel tight. Choose a formula that feels comfortable after rinsing. Avoid harsh cleansers if your skin often feels dry or irritated.

In the morning, one gentle cleanse may be enough for many people. At night, cleansing becomes especially important after sunscreen or makeup. If you wear makeup, you can use an oil cleanser or cleansing balm first, followed by a water-based cleanser.

Skin Type Cleanser Choice What To Look For
Dry Creamy cleanser Gentle, hydrating feel
Oily Light gel cleanser Comfortable oil control
Combination Mild gel cleanser Balanced cleansing
Sensitive Fragrance-free cleanser Minimal, gentle formula

💧 Step 2: Add A Hydrating Toner

A Korean toner is often used to add lightweight hydration after cleansing. Modern toners are usually much gentler than older astringent formulas. They can help your skin feel softer and more comfortable before applying other products. Look for ingredients such as glycerin, hyaluronic acid, panthenol, or soothing plant extracts.

You do not need to soak your face with toner. Apply a small amount with clean hands and gently pat it into the skin. If your skin feels comfortable after cleansing, toner can be a useful but optional step.

✨ Step 3: Try An Essence

Essence is one of the products often associated with Korean skincare. It usually has a lightweight texture and focuses on hydration and skin comfort. Some essences may also contain ingredients that support a brighter, smoother-looking complexion. However, an essence is not essential for every beginner.

If you are building your first routine, add an essence after you understand how your skin reacts to the basics. Apply a small amount after toner and before serum. Give each layer a moment to settle instead of applying too much product at once.

Beginner tip: Hydration does not have to feel heavy. Lightweight layers can help your skin feel comfortable without creating a greasy finish.

🎯 Step 4: Choose A Serum For Your Skin Goals

Serums contain concentrated ingredients designed for specific skin concerns. Your choice should depend on what you want to improve rather than what is trending online. For example, niacinamide is commonly used for the look of uneven tone and excess oil. Hydrating serums can be useful when skin feels dry or dehydrated.

Avoid adding several powerful serums at the same time. Start with one product and give your skin time to adjust. This also makes it easier to identify which product is helping or causing irritation.

Skin Goal Helpful Ingredient Beginner-Friendly Focus
Hydration Hyaluronic acid Adds moisture
Uneven-looking tone Niacinamide Supports a brighter appearance
Dryness Panthenol Helps support comfort
Dull-looking skin Vitamin C Supports brighter-looking skin
Skin barrier support Ceramides Helps maintain the barrier

🧴 Step 5: Lock In Moisture With A Moisturizer

Moisturizer helps reduce moisture loss and supports the skin barrier. Even oily skin can benefit from moisturizing. The key is choosing a texture that matches your skin type. Gel creams may feel comfortable on oily skin, while richer creams can suit dry skin.

Apply moisturizer after your lighter products have settled. You only need enough to create a comfortable layer over your skin. If your face feels greasy afterward, try using less product or choosing a lighter formula.

☀️ Step 6: Never Skip Sunscreen

Sunscreen is one of the most important steps in any daytime skincare routine. It helps protect skin from UV exposure, which can contribute to premature skin aging and uneven-looking pigmentation. Choose a broad-spectrum SPF 30 or higher sunscreen for everyday use.

Apply sunscreen as the final morning skincare step. Reapply when needed, especially during extended outdoor exposure. Remember that a beautiful skincare routine cannot replace daily sun protection.

🌙 Step 7: Build A Simple Night Routine

Your nighttime routine can be slightly different from your morning routine. Start by removing makeup and sunscreen, then cleanse your skin thoroughly. Follow with toner, essence, serum, and moisturizer if those products suit your routine.

You do not need every step every night. Beginners often get better results by keeping their routine consistent and manageable. A simple routine that you follow regularly is more useful than a complicated routine you rarely use.

A basic nighttime order looks like this:

  1. Cleansing balm or oil, if needed
  2. Gentle water-based cleanser
  3. Toner
  4. Essence
  5. Serum
  6. Moisturizer

🧖 Step 8: Add Exfoliation Carefully

Exfoliation can help remove dead surface skin cells and improve the look of rough texture. However, it is easy to overdo this step. Using several exfoliating products together may leave your skin feeling dry, sensitive, or uncomfortable.

Beginners should start slowly rather than exfoliating every day. Choose either a gentle chemical exfoliant or another suitable exfoliating product. Always follow the product instructions and pay attention to how your skin responds.

🧪 Step 9: Understand Skin Types Before Buying

Knowing your skin type can make choosing Korean skincare products much easier. Dry skin may feel tight and benefit from richer hydration. Oily skin often looks shiny and may prefer lightweight products. Combination skin can have both oily and dry areas.

Sensitive skin requires extra care when introducing new products. Look for simple formulas and introduce one new product at a time. Patch testing can also help you spot potential reactions before using a product across your entire face.

Skin Type Routine Priority Texture To Consider
Dry Moisture and barrier care Creams and rich lotions
Oily Lightweight hydration Gels and watery formulas
Combination Balance Light creams or gel creams
Sensitive Gentle care Simple, fragrance-free formulas

🛍️ Step 10: Do Not Buy Every K-Beauty Product

Korean skincare can be exciting because there are so many interesting products available. However, buying everything at once can make your routine confusing and expensive. It can also make it difficult to know which product is responsible for a reaction.

Start with a four-product foundation if you want to keep things simple:

  • Gentle cleanser
  • Hydrating moisturizer
  • One targeted serum
  • Daily sunscreen

Once these products work well for you, consider adding toner or essence. Build your routine based on your skin rather than following a fixed number of steps.

🚫 Step 11: Avoid Common Beginner Mistakes

One common mistake is changing products too frequently. Skin often needs time to adjust, and constantly switching products makes it difficult to judge results. Another mistake is using too many active ingredients at once.

You should also avoid scrubbing your face aggressively. Strong fragrance, harsh exfoliation, and excessive cleansing may make your skin uncomfortable. Healthy skin does not need to feel squeaky clean. It should generally feel comfortable, clean, and hydrated.

📋 Step 12: Follow The Right Product Order

The basic Korean skincare order follows a simple rule: apply lighter products before heavier ones. This allows watery products to go on first, followed by thicker formulas. Sunscreen comes last in the morning because it creates a protective layer over your skincare.

Your routine does not need to be perfect every day. If you are tired, focus on the essentials. Consistency matters much more than following a long routine without fail.

Morning ☀️ Evening 🌙
Gentle cleanser Makeup/sunscreen remover
Toner, optional Gentle cleanser
Essence, optional Toner, optional
Serum Essence, optional
Moisturizer Serum
Sunscreen Moisturizer

🌟 How Long Does Korean Skincare Take To Work?

Skincare results rarely happen overnight. Hydration may make your skin feel smoother fairly quickly, while concerns such as uneven tone or texture can take longer. Your results will also depend on your skin type, products, consistency, and lifestyle.

Instead of checking your skin every morning for dramatic changes, focus on gradual improvements. Notice whether your skin feels more comfortable and hydrated. If a product causes persistent burning, swelling, or significant irritation, stop using it and consider professional advice.

💖 Final Takeaways For Beginners

A Korean skincare routine does not need to be complicated to be effective. Start with cleansing, moisturizing, and sunscreen, then add hydration and targeted products as needed. This approach keeps your routine simple while giving you room to understand your skin.

Remember these key points:

  • Keep your routine simple at first.
  • Choose products according to your skin type.
  • Introduce new products gradually.
  • Do not over-exfoliate.
  • Use sunscreen every morning.
  • Give your routine time to work.
  • Listen to how your skin feels.

The real secret behind beginner-friendly K-beauty is consistency. 🌸 Build a routine you can comfortably follow every day, and let healthy-looking skin develop gradually.

❓ FAQs About Korean Skincare For Beginners

What Is The Best Korean Routine For Beginners?

A simple routine includes cleanser, moisturizer, and sunscreen. You can later add toner, essence, or serum. Start slowly so your skin can adjust.

How Many Korean Products Should I Use?

Beginners can start with three to four products. A cleanser, moisturizer, serum, and sunscreen are enough for a basic routine. Add other products only when you need them.

What Goes First In Korean Skincare?

Apply products from the lightest texture to the heaviest. Cleanser comes first, followed by toner and other lightweight products. Finish with moisturizer and sunscreen in the morning.

Is Korean Skincare Good For Sensitive Skin?

Korean skincare can work well for sensitive skin when gentle products are chosen. Look for simple formulas and avoid introducing several actives together. Always pay attention to how your skin reacts.

Can Beginners Use Korean Serums Daily?

Some gentle serums can be used daily, depending on their ingredients. Start once daily or according to the product directions. Strong active ingredients may require a slower introduction.


It’s the second snooze on the alarm clock, the shower mirror is fogged, and you’re shaving over skin that was just shaved yesterday. Before long, you’ll feel that prickly stubble on your collar or waistband. Then you’ll be in the gym, and sweat will land on a fresh shave and sting in that way you know too well, which is burning, stinging, and even bumps. If you’re like most people who shave, this cycle is almost a part of your everyday routine.

If that cycle sounds all too familiar, you may be considering waxing as a way to get more time between grooming sessions. Because wax removes the entire hair from the root instead of just shaving the surface, the regrowth takes a bit longer to emerge. But switching to waxing takes a bit of a commitment if the shave routine has been a part of your morning ritual for years, right along with your toothbrush and deodorant.

Why You May Feel Like You’re Always Shaving

Shaving is quick and easy, and provides a very close shave. But soon enough, the hair re-grows, and the tip of the hair feels blunt and rough when you put on leggings, pull a stiff work collar around, or rest your arm on a rough desk edge. Shave that same patch again and you may be shaving skin that hasn’t quite healed yet. And ingrown hairs can also be a problem. If a short hair curls back into the skin or gets trapped under dead skin cells (there is a useful breakdown at https://mayoclinic.org/diseases-conditions), then you can end up with a painful bump in places where a backpack strap, sports bra band, or pant seams rub. And poking at them with your fingernails or tweezers can irritate the skin and potentially leave a scar.

What To Know Before Your First Waxing Appointment

For the wax to grab hold of the hair, it needs to grow out a little bit. Going right after a shave means there’s not much for the wax to grab on to, much like trying to pick up a thread that’s been cut level with the fabric. The staff at A Better Cut Salon will be able to advise you on how long you should wait, depending on the body area and how long you’ve been shaving.

Here are some tips to prepare for your first appointment:

  • Dress comfortably; wear a pair of soft sweatpants or a soft cotton tee instead of pants with a hard waistband that would rub against your skin.
  • Come to your appointment with clean, dry skin and no body oils.
  • Mention any irritation, open sores, sunburn, or products you’ve used that might have made your skin extra-sensitive.
  • Don’t work out right before your appointment. A damp compression layer and rubbing can be irritating on freshly-waxed skin.
  • Exfoliating gently before your appointment may help remove dead surface cells that could interfere with hair removal, but don’t go too hard with your scrubber or brush. If you use a rough exfoliating glove or mitt, using it with too much pressure the night before could make your skin more sensitive than using a softer washcloth a few days before.

Your First Time May Not Be Perfect

Because hair has its own growth cycle, the first appointment may not get all the hairs at once. In fact, you may notice that some of the hair will return sooner than expected. Some of the hair that returns could look like a few tiny dark pencil strokes among smooth skin. If you reach for your razor to shave those areas, you could throw off the schedule for future appointments.

As you continue with waxing, it may become easier to keep track of when to come in because there will be more hair to remove at each appointment. How long it takes for you to need to return depends on the area you’re treating, your hair type, and your preferences. Keep an eye on the calendar, but also keep an eye out for when the hair gets long enough for the wax to grab onto, or when it starts snagging on socks, cuffs, and tight clothes.

Article image

How to Care for Your Skin After the Appointment

During the first day or two, try to stay away from things like heat, friction, and excessive sweating (look here). Sitting in a hot car or getting in a sauna, going for a swim, or doing a long spin class may feel a lot worse on freshly waxed skin. Stick with loose clothing and avoid activities that make you sweat heavily. If your skin is a little red, letting it breathe in a cool, comfortable environment may help it to calm down faster.

Once your skin is calm, you can start to gently exfoliate the skin to prevent hairs from becoming trapped. Don’t use a sharp-edged object to repeatedly scrape at a bump that appears. Using a moisturizer can also help keep skin soft and supple, which is especially helpful on areas like the knees and ankles that tend to get dry and flaky.

Article image

A New Grooming Routine With More Time Between Visits

Letting the razor sit idle in the drawer might feel odd if you’re used to shaving regularly, especially when a morning shave is part of a rushed work day. However, with a little preparation, a realistic outlook, and easy-to-follow post-shave care, waxing can take the place of a daily scrape-and-rinse routine with spaced-out salon visits and calmer mornings, even while your coffee cools beside a half-packed gym bag.

San Diego has no shortage of reasons to dress up and celebrate. Weddings, engagement parties, birthdays, vacations, family photos, graduations, corporate events, and nights out happen throughout the year.

If a spray tan is part of your preparation, one of the most common questions is simple: When should you schedule it?

For many special events, getting your spray tan approximately two to three days beforehand gives the color time to develop and settle into a natural-looking glow.

Here are a few things to consider when planning your appointment.

Why You Shouldn’t Wait Until the Day of Your Event

Getting a spray tan the morning of an important event may sound convenient, but it usually isn’t ideal.

Depending on the solution used, your tan may need several hours to develop before your first rinse. The color can also continue developing afterward.

Scheduling your appointment ahead of time gives you an opportunity to complete your recommended rinse and let the finished color settle before getting dressed for your event.

For a Saturday wedding or party, for example, a Thursday appointment may be a better choice than waiting until Saturday morning.

Weddings and Bridal Events

Spray tanning has become a popular part of wedding preparation for brides, bridesmaids, and wedding guests who want natural-looking color for photographs.

For an important event like a wedding, planning ahead is especially helpful.

Consider your rehearsal dinner, wedding day, honeymoon departure, and any other events taking place during the week when choosing your appointment date.

A professional spray tan in San Diego can also be customized to the client’s complexion and desired level of color rather than applying the same shade to everyone.

Vacations and Cruises

Heading somewhere warm?

Scheduling a spray tan before leaving can give you a vacation-ready glow without spending the first several days of your trip intentionally tanning.

Ideally, you’ll want enough time to complete your initial rinse before traveling.

This can be particularly helpful when you’re flying or taking a cruise because tight clothing, sweating, water, and other activities can interfere with a tan that is still developing.

Family and Professional Photos

Professional photography is another occasion where subtlety matters.

You probably don’t want to look dramatically different from your normal appearance. Instead, the goal may be to add a little warmth and even-looking color.

A customized airbrush application allows the technician to consider your natural skin tone and the look you’re trying to achieve.

For family photos, engagement pictures, headshots, or other professional photography, tell your technician about the occasion during your consultation.

Graduations

San Diego’s graduation season brings ceremonies and professional photography at universities throughout the region.

Students may have graduation portraits, commencement ceremonies, dinners, and parties occurring within a relatively short period.

Getting a spray tan a few days before the main event can allow the color to develop before photographs begin.

Don’t Forget About Preparation

Appointment timing isn’t the only thing that affects your results.

Preparing your skin properly can make a significant difference in how evenly your spray tan develops.

Common preparation steps include exfoliating ahead of your appointment, shaving or waxing in advance, and arriving with clean, dry skin.

Avoiding lotions, oils, perfume, and deodorant immediately before the application can also help prevent products from interfering with the tanning solution.

For a complete checklist, BlushTan offers a guide to preparing for a spray tan with tips for before and after an appointment.

Your First Rinse Matters

Once your spray tan has been applied, your technician should tell you how long to wait before rinsing.

Different tanning solutions have different development times, which is why following the instructions for your specific tan is important.

During the development period, try to avoid swimming, showering, strenuous exercise, and anything else that could expose your skin to significant moisture.

After your recommended development time, follow the rinse instructions provided by your technician.

Moisturize After Your Tan

After your first rinse, hydration becomes an important part of maintaining your results.

Dry skin can contribute to uneven-looking fading, so regular moisturizing can help your skin remain hydrated as your tan gradually fades.

You should also be cautious with aggressive exfoliation and skincare ingredients that may remove surface skin cells more quickly.

Choose Your Shade for the Occasion

Another advantage of custom airbrush tanning is that darker isn’t automatically better.

Someone preparing for a beach vacation may want a different result than someone preparing for bridal portraits.

A personalized consultation allows your technician to consider your natural coloring, undertones, clothing, event, and desired result.

The objective should be to complement your appearance rather than overwhelm it.

Planning Your San Diego Event Glow

A little planning can make your spray tan much easier to incorporate into your event schedule.

For many clients, booking approximately two to three days beforehand provides a comfortable window for the color to develop and settle.

BlushTan San Diego specializes in customized airbrush spray tanning with studios in La Jolla, Encinitas, and Bankers Hill, making it convenient for clients preparing for events throughout San Diego.

Whether you’re attending a wedding, leaving for vacation, taking family photos, or celebrating a major milestone, choosing the right appointment timing can help you arrive with a natural-looking glow.

Key Takeaways

  • Early detection of thinning hair is vital for the success of any regrowth or strengthening programme.
  • A healthy scalp is the “soil” for your hair; keeping it clean and stimulated is essential for thick growth.
  • Stress and poor nutrition are leading contributors to temporary hair shedding and should be managed alongside professional treatments.

Introduction

Dealing with hair thinning can be an emotional journey, affecting how you feel about your appearance and confidence. Whether it’s caused by genetics, lifestyle changes, or environmental stressors, the desire for a fuller mane is universal. Fortunately, modern science has provided us with effective ways to combat this issue and encourage new growth. If you are looking for a professional environment to begin your journey, visiting a high-quality hair salon in Orchard offers access to the latest technologies and expert advice in a convenient, central location. Taking a proactive stance today is the best way to ensure a thicker head of hair tomorrow.

The Life Cycle of Your Hair

Every strand of hair on your head goes through a natural cycle: growth (anagen), transition (catagen), and resting (telogen). Under normal circumstances, you lose about 50 to 100 hairs a day as they reach the end of the resting phase. However, when this cycle is disrupted, more hairs enter the resting phase simultaneously, leading to noticeable thinning. Factors such as hormonal imbalances, lack of iron, or even the harsh minerals in tap water can prematurely push hair into the shedding phase.

To address this, an effective anti-hair loss treatment focuses on extending the growth phase and revitalising dormant follicles. By using targeted serums and advanced therapies like low-level light treatment or microcurrent stimulation, professionals can encourage blood flow to the scalp. This increased circulation delivers more oxygen and nutrients to the roots, which is exactly what is needed to produce stronger, thicker strands. Understanding that this is a gradual process helps in setting realistic expectations for your transformation.

The Role of Scalp Health in Hair Density

Think of your scalp as the foundation for your hair. If the scalp is congested with excess sebum, dead skin cells, or product buildup, the hair follicles can become “suffocated,” leading to thinner growth or even complete blockage. Many people focus solely on the hair they can see, but the real work happens beneath the surface. Regular scalp scaling or deep-cleansing treatments are essential for removing these obstructions and creating an optimal environment for growth.

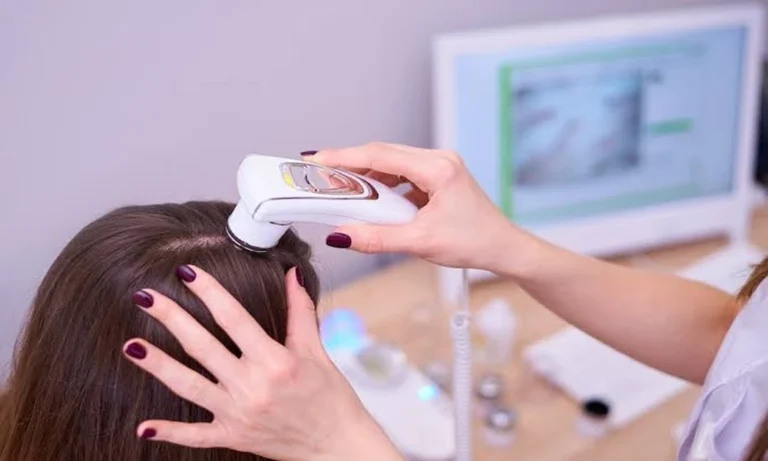
In a professional setting, such as a reputable hair salon in Orchard, stylists use specialised cameras to give you a close-up view of your scalp’s condition. This allows them to identify issues like inflammation or dryness that you might not be able to feel. Based on these findings, they can recommend a customised treatment plan that balances your scalp’s pH levels and provides the necessary hydration. A clean, healthy scalp is the first and most important step toward achieving the density you desire.

Nutritional and Lifestyle Adjustments

While external treatments are powerful, they work best when supported by a healthy internal environment. Your hair is made of a protein called keratin, so ensuring you have enough protein in your diet is crucial. Vitamins like Biotin, Vitamin D, and Zinc also play significant roles in hair production. If you are going through a particularly stressful period, your body may divert nutrients away from “non-essential” functions like hair growth, which is why relaxation and sleep are more important for your tresses than you might think.

Avoiding harsh habits also makes a big difference. Constant tight hairstyles can lead to “traction alopecia,” where the hair is literally pulled out by the root. Similarly, frequent high-heat styling without protection can weaken the hair you already have, making the thinning look more pronounced. By combining gentle at-home care with professional interventions, you give your hair the best possible chance to thrive. Consistency is the secret ingredient that turns a temporary fix into a long-term success.

When to Seek Professional Advice

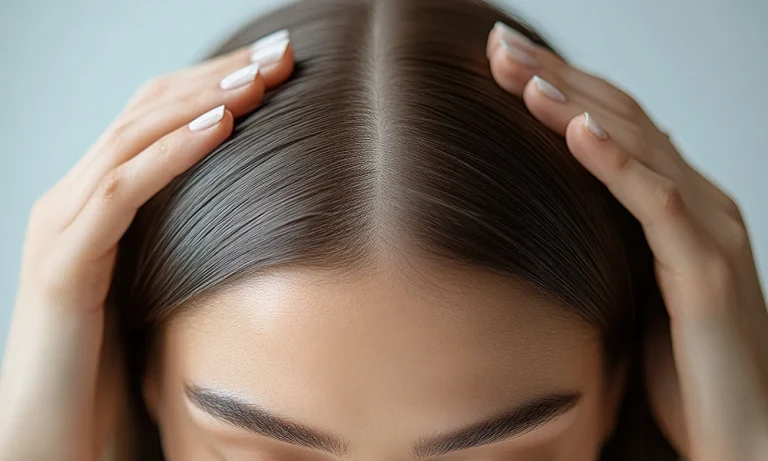
The best time to start an anti-hair loss treatment is the moment you notice a change in your hair’s density or a wider parting. Early intervention can often stop the progression of thinning and help you retain the hair you have. Waiting until there are large visible patches makes the recovery process much more difficult. Professional stylists can provide the guidance and high-potency products that are simply not available over the counter, ensuring that your efforts are focused and effective.

Conclusion

Getting thicker hair is a multi-faceted process that involves scalp care, professional treatments, and lifestyle changes. By visiting a specialist, you gain the benefit of expert diagnosis and advanced technology. Do not let thinning hair hold you back from feeling your best. With the right plan and a little patience, you can restore the volume and health of your hair, giving you a look you are proud to show off.

Contact Stile Hair Studio to visit our Orchard location for a scalp analysis.