Category

Beauty & Style

Category

As an avid lover of fragrances, you may find yourself captivated by the intricate layers and harmonious blend of scents that make up an Eau de Parfum. In this comprehensive guide, we will delve into the depths of Symphony Of Scents, exploring the top, heart, and base notes of Eau de Parfum. Join us on this olfactory journey as we unravel the secrets behind the creation of these exquisite fragrances.

The Role of Top Notes

The first impression is often the most memorable, and that is precisely the role of top notes in an Eau de Parfum. These ephemeral scents are the initial burst of fragrance that greets your senses upon application. They are designed to be light, refreshing, and evocative, captivating your attention from the very first moment.

Top notes are often derived from citrus fruits, such as bergamot, lemon, or orange, which lend a zesty and uplifting quality to the fragrance. The purpose of these top notes is to create an immediate impact, leaving a lasting impression on those around you.

The Essence of Heart Notes

Once the top notes have dissipated, the heart notes begin to reveal themselves, forming the essence of the fragrance. These middle notes are the heart and soul of an Eau de Parfum, evoking a sense of depth and complexity.

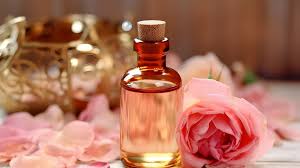
Heart notes are typically floral or herbal in nature, showcasing the delicate beauty of flowers like rose, jasmine, or lavender. They add a sensual and alluring dimension to the fragrance, creating a captivating and memorable experience.

The Foundation of Base Notes

An Eau de Parfum’s base notes serve as the cornerstone around which the entire scent is built. The piece is held together by these notes, which are the longest-lasting.

Base notes are often derived from rich and woody ingredients like sandalwood, patchouli, or vanilla. They impart a sense of warmth, depth, and sensuality to the fragrance, ensuring its longevity on the skin.

The Art of Blending

Crafting an Eau de Parfum is an art form that requires a meticulous blend of top, heart, and base notes. Perfumers carefully select and combine various ingredients, creating a symphony of scents that harmonize to form a unique and captivating fragrance.

The balance between these notes is crucial, with each ingredient playing a specific role in the overall composition. The top notes provide the initial impact, the heart notes create the character, and the base notes ensure longevity and depth.

Exploring Eau de Parfum Online

In today’s digital age, the world of fragrance is at our fingertips. With just a few clicks, you can explore a wide range of Eau de Parfum online, discovering new scents and brands from the comfort of your own home.

When searching for Eau de Parfum online, it is essential to consider the fragrance families, notes, and customer reviews. This information can help you make an informed decision and find the perfect scent that resonates with your personal style and preferences.

Conclusion

In the symphony of scents that is Eau de Parfum, each note plays a crucial role, contributing to a harmonious and captivating composition. The top notes create the first impression, the heart notes add depth and complexity, and the base notes provide a solid foundation.

By exploring the world of Eau de Parfum online, you can discover a vast array of scents that suit your unique personality and style. Embrace the power of fragrance and let it become a part of your identity, leaving an indelible mark on those around you.

As you embark on your olfactory journey, remember to choose a fragrance that resonates with you, captivates your senses, and reflects your true essence. Let the symphony of scents guide you to a world of elegance, sophistication, and self-expression.


Having full, well-defined eyebrows can enhance your facial features and frame your eyes beautifully. While some people naturally have thick brows, others may need a little help to achieve their desired look. Thanks to modern beauty techniques, getting fuller brows is easier than ever. From eyebrow pencils to growth serums, there are plenty of products available. But if you’re looking for a longer-lasting solution that doesn’t require daily application, eyebrow tinting might be the perfect choice.

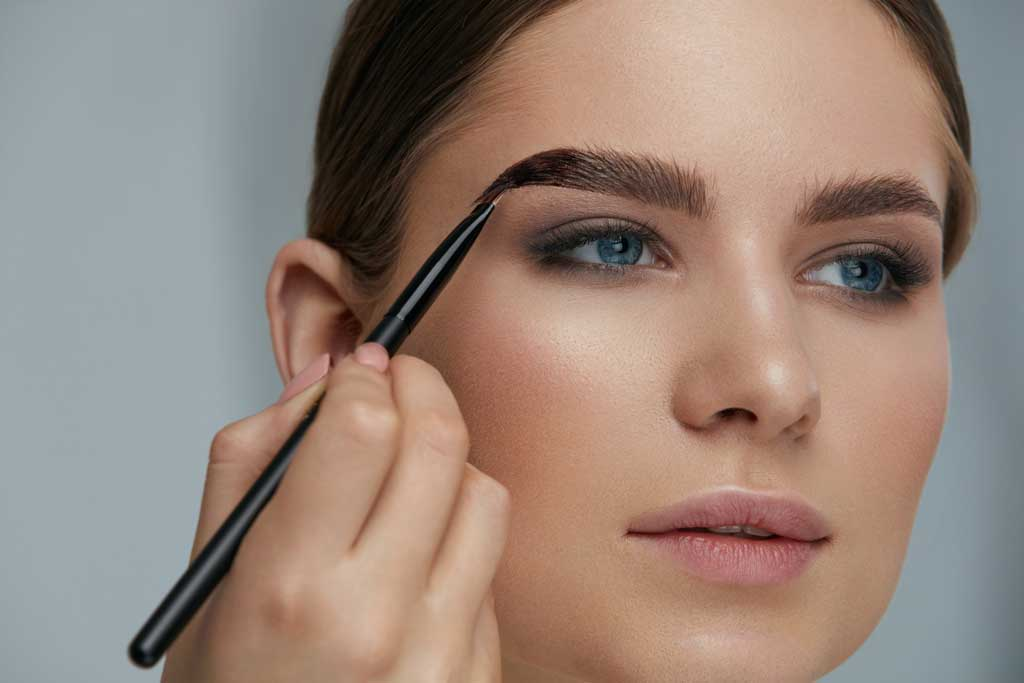
Eyebrow tinting is a semi-permanent way to darken and define your brows, giving them a fuller appearance without the need for makeup. Unlike microblading or microshading, which involve pigment being applied to the skin, eyebrow tinting is a non-invasive process that focuses on enhancing your natural brow hairs. Plus, it’s quick, painless, and budget-friendly.

In this guide, we’ll cover everything you need to know about eyebrow tinting, including how it works, who it’s best for, how to maintain it, and what to consider before getting it done.

What is Eyebrow Tinting?

Eyebrow tinting is a beauty treatment that involves applying semi-permanent dye to the brows to enhance their color, shape, and definition. By darkening the fine, light hairs around and within your brows, tinting creates the illusion of fuller, more defined eyebrows. The dye is typically made from vegetable-based formulas or henna, which are mixed to match your natural brow color.

According to brow expert Azi Sacks, “Tinting allows a professional to enhance the brows by darkening fine hairs and increasing the overall width. It also helps fill in sparse areas, giving a more balanced and structured look.”

How Long Does Eyebrow Tinting Take?

A typical eyebrow tinting session takes about 15 minutes, making it a quick and convenient beauty treatment. The process includes:

  1. Consultation – You’ll discuss your desired brow shape and color with a professional.
  2. Preparation – The brows are cleansed, and a protective barrier (such as petroleum jelly) is applied around them to prevent skin staining.
  3. Dye Application – The dye is carefully applied in layers, first following the natural direction of hair growth, then in the opposite direction for even coverage.
  4. Processing Time – The dye sits for a few minutes, depending on how dark you want the brows.
  5. Removal – Excess dye is gently wiped away, revealing your newly tinted brows.

The entire process is quick and painless, making it a great option for anyone looking to enhance their brows without spending too much time.

Who is Eyebrow Tinting Best For?

Eyebrow tinting works well for most people, regardless of hair type or color. However, it’s especially beneficial for:

  • Those with light or blonde eyebrows who want more definition.
  • People with sparse brows looking to create a fuller appearance.
  • Anyone who wants a low-maintenance alternative to daily brow makeup.

If you have grey or white hairs in your brows, tinting can be a bit trickier. Grey hairs are more resistant to dye, so make sure you visit an experienced professional who knows how to work with them effectively.

How Soon Will You See Results?

You’ll notice the difference immediately after your appointment. Your brows will look darker, fuller, and more defined right away. However, avoid getting them wet for at least 12 hours to ensure the dye sets properly. The results typically last between 3 to 6 weeks, depending on factors such as skin type, skincare routine, and exposure to water or sun.

To extend the longevity of your tint:

  • Avoid using oil-based skincare products around your brows.
  • Skip exfoliating products that can fade the tint faster.
  • Consider using castor or almond oil to help maintain the color and keep brow hairs healthy.

Is Eyebrow Tinting Safe?

While eyebrow tinting is generally safe, it’s important to be aware of potential risks. In some places, such as California and New York, professional eyebrow tinting is restricted due to concerns over certain dye ingredients. Some dyes contain para-phenylenediamine (PPD), a chemical that can cause allergic reactions in sensitive individuals.

To stay safe:

  • Always do a patch test before getting your brows tinted.
  • Visit a reputable salon that uses high-quality, safe dyes.
  • Ask your technician about the ingredients used in their dyes.

If you have sensitive skin, consider requesting a vegetable-based or henna dye, which may be gentler on the skin.

What Are the Downsides of Eyebrow Tinting?

While eyebrow tinting is a great solution for fuller brows, there are a few drawbacks to consider:

  • Short-Term Results: The tint only lasts 3 to 6 weeks, so regular touch-ups are needed.
  • Cost Over Time: A session typically costs between $35 to $40, which can add up if you maintain it regularly.
  • Potential Allergies: Some dyes contain allergens, so always do a patch test.
  • Regulations Vary by Location: Some states have stricter regulations regarding eyebrow tinting, so research local laws before booking an appointment.

Can You Tint Your Brows at Home?

Yes, at-home eyebrow tinting kits are available, but they should be used with caution. If you decide to tint your brows at home:

  • Choose a high-quality brow tint kit designed for eyebrows, not hair dye.
  • Follow all instructions carefully, including patch testing before applying the dye.
  • Never use hair dye on your eyebrows—it contains harsh chemicals that can be dangerous near your eyes.

While DIY tinting can be a budget-friendly option, visiting a professional is often the best way to ensure even results and a safe application.

Final Thoughts

Eyebrow tinting is a simple and effective way to enhance your brows, giving them more definition and fullness without daily maintenance. Whether you get it done professionally or try an at-home kit, it’s a great option for anyone looking for a quick beauty upgrade. Just be sure to research your technician, check the ingredients in the dye, and do a patch test to ensure safety.

If you want a fuller brow look without using makeup every day, eyebrow tinting might be the perfect solution for you!


If you are looking for a unique nail polish that will dry quickly and allow you to continue your regular activities, then you should not look beyond gel polish. Once women apply this polish, they usually prefer to cure it under a UV lamp. This is because it dries fast and gives nails a shiny and strong finish. However, some women prefer to use LED lamps, too, to cure gel polish. The fact is, people can use both mediums to cure gel polish, as either is fine. The curing light is dependent on a couple of criteria. It depends on the kind of gel polish she is using and her preferences.

You will find gel polish created mainly in two distinct processes. These are LED-cured or UV-cured. As a matter of fact, you should be mindful that an LED light seems less harmful to the skin. If you use gel polish regularly, you should think of using this light. Regardless of the lamp you use, you should shield your skin beforehand. It is always a nice idea if you do your nails frequently. However, a good quality gel polish should be the priority. Get them from any reliable company like https://vossy.dk that offers only the best gel polishes. 

Choosing your gel polish

When the matter zeroes on gel polish, you will come across a wide variety in terms of quality and price. A few options propose greater longevity, whereas some work to strengthen your natural nails. So, you must select a salon that will provide superior-quality choices specially curated for you. The price of gel differs based on your location. The average price of a simple gel manicure varies between $50 and $70 for only one color. Now, if you opt for hard gel, you will find the cost to vary between $80 and $150 based on whether they are extensions or an overlay. 

Nonetheless, high-quality gels never damage the nails. But every person should find an ideal way to remove them. You must also avoid filing down your nails too far. Always utilize superior-quality products besides some clean tools. Regardless of whatever you do, never peel the gel polish off.

Effective removal

You can remove gel polish easily. You need to devote a little time to it. The best way to remove it is by using Remover Wraps and a special remover. Additionally, you can also prefer to utilize a Peel Base that makes it easier to remove the polish manicure in the absence of a remover. For added information on the Vossy gel polish and the proper method to remove it, visit vossy.dk.


Navigating the world of skin care can feel like an endless quest for the perfect routine. With an overwhelming array of products promising youthful, glowing skin, making informed choices is crucial. Understanding the vital aspects of skincare products is essential to tailor a routine that meets your specific needs, ensuring your skin receives the nourishment and protection it deserves. 

Here, we delve into five critical factors to consider when selecting the best skin care products for your regimen. 

Skin type compatibility 

The cornerstone of effective skin care is recognizing your skin type—be it oily, dry, combination, sensitive, or normal. Products are formulated with specific skin types in mind, and using the wrong type can lead to irritation, breakouts, or dryness. Look for products that match your skin type, with labels such as “oil-free” for oily skin or “hydrating” for dry skin, to ensure they work harmoniously with your natural skin characteristics.

Ingredient analysis 

Ingredients are the heart of any skin care product. Opt for products with active ingredients that target your specific concerns, such as hyaluronic acid for hydration, salicylic acid for acne-prone skin, or retinol for aging skin. Equally important is to avoid harmful ingredients like parabens, sulfates, and phthalates, which can irritate or damage the skin over time.

Product authenticity 

With the rise of counterfeit beauty products, ensuring the authenticity of your skin care is paramount. Purchase products from reputable retailers or directly from the brand’s website. Authentic products guarantee you are getting the quality and safety promised by the brand, protecting your skin and your investment.

Customer reviews and recommendations 

Before making a purchase, explore reviews and recommendations from other users with similar skin types and concerns. Real-world feedback can provide valuable insights into the product’s performance, helping you make an informed decision. However, remember that individual results may vary, so use this information as one of many factors in your decision-making process. 

Price versus value 

While the price of skin care products can vary widely, higher cost does not always equate to higher quality. Consider the value a product offers in terms of ingredient quality, quantity, and effectiveness for your specific needs. Sometimes, affordable products deliver the same, if not better, results than their luxury counterparts. 

Final thoughts 

By focusing on these five vital aspects, you can curate a skin care routine that not only addresses your unique concerns but also paves the way for healthier, more radiant skin. 


Choosing the perfect nose ring to enhance your facial beauty can be a daunting task, given the myriad of options available. From studs to hoops, there’s a style for every face shape and personal taste. 

In this comprehensive guide, we’ll explore valuable tips to help you select the best nose ring that complements your unique features and adds an extra touch of elegance to your overall look.

  1. Understanding Your Face Shape

Before diving into the world of nose rings, it’s crucial to identify your face shape. Different face shapes suit different styles of nose rings. For instance, those with oval faces can pull off almost any style, while individuals with round faces may opt for elongated designs to add definition.

  1. Matching Metals to Skin Tone

The metal of your nose ring should harmonize with your skin tone. Gold nose rings, for example, tend to complement warmer skin tones, while silver or white gold suits cooler undertones. Experiment with different metals to find the one that enhances your natural radiance.

  1. Consider Your Style Quotient

Your personal style plays a significant role in choosing the right nose ring. If you prefer a minimalist look, a small and subtle stud might be the perfect choice. On the other hand, if you love making a bold statement, a decorative hoop or a jeweled nose ring could be ideal.

  1. Taking Into Account Allergies

For individuals with sensitive skin or metal allergies, selecting hypoallergenic materials is crucial. Titanium and platinum are excellent choices as they are less likely to cause skin irritation, ensuring comfort without compromising style.

  1. Explore Different Designs

Diversity in design is vast when it comes to nose rings. From intricate patterns to minimalist shapes, exploring various designs allows you to find a nose ring that truly resonates with your personality. Don’t be afraid to step out of your comfort zone and try something new.

  1. Sizing Matters

Choosing the right size is paramount. Nose rings come in various diameters, and selecting the appropriate size ensures a comfortable fit. A snug fit prevents the nose ring from appearing too large or too small, maintaining a balanced and flattering look.

  1. Consider Your Lifestyle

Your daily activities should influence your choice of nose ring. If you lead an active lifestyle, a secure and low-profile stud may be preferable. Conversely, if you have a more laid-back routine, you might explore larger, more ornate options.

  1. Seek Professional Advice

Visiting a professional piercer can provide valuable insights into what type of nose ring will suit you best. They can guide you on the latest trends, proper sizing, and offer suggestions based on your unique features.

  1. Mix and Match

Feel free to experiment with multiple nose rings to create a customized and eclectic look. Mixing metals or combining studs with hoops can add a dynamic flair to your appearance, allowing you to express your creativity.

  1. Confidence Is Key

Ultimately, the best nose ring is the one that makes you feel confident and beautiful. Embrace your choice with confidence, knowing that your unique style shines through, making a statement that complements your facial features and overall beauty.

Conclusion

Choosing the best nose ring involves a thoughtful consideration of factors like face shape, skin tone, personal style, and lifestyle. By taking the time to explore various options and seeking professional advice when needed, you can find the perfect nose ring that not only complements your face beauty but also becomes a stylish extension of your personality. So, go ahead, embrace the diversity of nose ring styles, and let your beauty shine.

Beautiful eyebrows have always been a sought-after feature of a woman’s face. However, in recent years, the focus on brows has elevated to an incredible new level. Women have tried everything from eyebrow pencils, gels, tattoos, and semi-permanent microblading to achieve perfect, full eyebrows to enhance their appearance. Microblading has been a popular choice among women for years, but now, the latest advancement in the world of microblading is ombre powder microblading. This technique gives a more defined, natural-looking finish and is perfect for those looking for a long-lasting solution to their eyebrow woes. This guide will share nine stunning benefits of this microblading technique.

9 Stunning Benefits of Ombre Powder Microblading

Long-lasting results:

One of the most significant benefits of this microblading technique is that it delivers long-lasting results. Unlike other semi-permanent methods that require regular touch-ups, this microblading technique is done using a digital pen and delivers results that last up to two years. It’s perfect for those who desire fuller, more defined eyebrows without the hassle of regular upkeep.

Natural-looking eyebrows:

The ombre powder microblading technique delivers natural-looking eyebrows. The powder effect creates a soft, natural-looking gradient effect that mimics the look of naturally grown eyebrows, making them look fuller and thicker. This technique is tailored specifically to the individual’s brows and facial structure, making it the perfect solution for those looking to enhance their eyebrows.

Minimal to no pain:

this microblading technique is considerably less painful than other eyebrow tattooing methods. The technician uses a digital pen with a needle that barely penetrates the skin, making it a relatively painless process. It’s perfect for those who are anxious about pain or are uncomfortable with invasive procedures.

Customizable:

This microblading technique is completely customizable. The technician can tailor this method specifically to each client, depending on their preferences and facial features. They can adjust the pigments, the depth of the strokes, and the overall look of the brows, making the final result look more natural and perfect for the client.

Saves time:

Do you spend hours perfecting your eyebrows every day? With this microblading technique, you don’t have to. It saves you time every morning, giving you the freedom to wake up, get dressed, and go. The results are perfect-looking eyebrows that don’t require any additional time or effort.

Waterproof:

Ombre powder microblading is waterproof. So, you don’t have to worry about your brows smudging or rubbing off while you’re swimming or sweating. This technique is perfect, even if you’re looking to have perfect brows while you’re running errands or working out.

No more eyebrow pencils or gels:

This microblading technique delivers full and natural-looking eyebrows, so you don’t have to worry about eyebrow pencils or gels. You’ll cut down on expenses and save time, as you won’t have to purchase or apply these cosmetic products anymore.

The healing process is faster:

The healing process of ombre powder microblading is much faster than other semi-permanent eyebrow tattooing methods. The tiny needle barely penetrates the skin, causing minimal trauma, which means that the eyebrows will heal quickly. The client can return to normal activities immediately after the treatment.

Low maintenance:

Unlike other eyebrow tattooing methods that require rigorous aftercare, this microblading technique is relatively low maintenance. After the initial couple of weeks, you’ll only need to apply a thin layer of moisturizer on your brows to keep them looking perfect.

Conclusion:

Ombre powder microblading is a revolutionary cosmetic tattooing method that delivers stunning, natural-looking eyebrows. This technique is perfect, even if you’re looking for a no-fuss solution to your eyebrow woes. The above benefits should help you understand the advantages of this technique, making it easier to decide if it’s the perfect solution for you. Book an appointment with a trusted technician today and experience the transformational results of this microblading technique.


In the picturesque coastal town of Noosa, where natural beauty surrounds you at every turn, it’s no surprise that locals and visitors alike seek ways to enhance their beauty. One popular choice that has taken Noosa by storm is lash extensions. These tiny, meticulously applied fibres can transform your lashes from ordinary to extraordinary, making your eyes the focal point of your face. In this blog post, we’ll explore the world of lash extensions in Noosa, from what they are to where to find the best lash artists and why they’ve become a must-have beauty treatment.

The Artistry of Lash Extensions

What Are Lash Extensions?

Lash extensions are semi-permanent fibres that are individually applied to your natural eyelashes using a special adhesive. Unlike traditional strip lashes or mascara, lash extensions provide a more natural and long-lasting solution for achieving fuller, darker, and curvier lashes. Each extension is carefully chosen to match your natural lashes’ length, thickness, and curl, creating a seamless and beautiful result.

The Lash Extension Process

Lash extensions are applied by trained and certified lash artists with a keen eye for detail. The process typically takes between 1.5 to 2 hours for a full set, during which you can relax with your eyes closed. The lash artist will isolate each natural lash and bond an extension to it, ensuring the extensions are evenly distributed for a stunning, fluttery effect.

Why Choose Lash Extensions in Noosa?

Natural Beauty Enhancement

Noosa is known for its laid-back, beachy vibe, and many residents and visitors prefer a natural look that complements the coastal lifestyle. Lash extensions provide a subtle enhancement that makes your eyes pop without looking overly dramatic or artificial.

Minimal Makeup, Maximum Impact

With lash extensions, you can significantly reduce your daily makeup routine. You won’t need mascara or eyeliner to achieve beautiful lashes, saving you time and effort each morning.

Ideal for Active Lifestyles

Noosa offers a range of outdoor activities, from surfing to hiking. Lash extensions are perfect for those with active lifestyles because they stay in place, even during water-based adventures.

Finding the Best Lash Artists in Noosa

Research and Recommendations

Start by asking for recommendations from friends, family, or acquaintances in Noosa who have lash extensions. Personal referrals often lead to finding skilled and reputable lash artists.

Online Reviews and Portfolios

Browse online platforms such as Google, Facebook, or Instagram to read reviews and view portfolios of local lash artists. This will give you a sense of their expertise and the quality of their work.

Consultations

Before committing to a lash appointment, consider consulting with a few lash artists. This allows you to discuss your desired look, ask questions, and assess their professionalism and cleanliness.

Lash Extension Aftercare

Once you’ve had your lash extensions applied, it’s crucial to maintain them properly to ensure they last as long as possible:

  • Avoid rubbing or pulling on your lashes.
  • Don’t use oil-based makeup removers or skincare products near your eyes.
  • Brush your lashes daily with a clean spoolie brush to keep them looking neat.
  • Attend regular touch-up appointments to fill in any gaps as your natural lashes shed and new ones grow in.

The Lasting Beauty of Lash Extensions

Lash extensions are not just a beauty trend but a lifestyle choice. They offer a way to effortlessly enhance your natural beauty, whether you’re enjoying a day at the beach or a night out in town. With the right lash artist and proper aftercare, your extensions can last for weeks, providing you with a consistently stunning look.

The Bottomline:

Lash extensions in Noosa offer a stunning way to effortlessly enhance your natural beauty. With their customizable looks, water-friendly nature, and long-lasting results, it’s no wonder they’ve become a beauty trend beloved by Noosa residents and visitors alike. To ensure you get the best lash extension experience, do your research, choose a reputable lash technician, and follow proper care guidelines. Whether you’re strolling along Noosa’s beautiful beaches or enjoying a night out in town, your lash extensions will have you looking and feeling your best.

There’s nothing quite like pampering yourself with a luxurious facial. It’s a rejuvenating experience that leaves you feeling refreshed, relaxed, and ready to conquer the world. But who says you have to spend a fortune at a spa to achieve that radiant glow? With the right facial kit and a little creativity, you can have a fabulous DIY facial right in the comfort of your own home. So, let’s dive into the world of self-care and discover five simple steps to get your glow on!

Step 1: Prepping and Cleansing

Before diving into your DIY facial, it’s important to prepare your skin properly. Start by cleansing your face with a gentle cleanser to remove any dirt, oil, or makeup. This will create a clean canvas for the rest of your facial. Once your skin is squeaky clean, pat it dry with a soft towel.

Step 2: Exfoliation Time

Next up is exfoliation, a crucial step to remove dead skin cells and reveal a fresh, radiant complexion. Take a small amount of exfoliator and massage it onto your damp face in circular motions. Pay extra attention to areas prone to congestion, such as the T-zone. Rinse off the exfoliator thoroughly, and voila! Your skin is now prepped and ready to absorb all the goodness of the following steps.

Step 3: Steaming and Nourishing

Prepare a bowl of hot water and add a few drops of your favorite essential oil. Lean over the bowl, covering your head with a towel, and allow the steam to work its magic. The steam will open up your pores, promoting better absorption of the facial products. Take this opportunity to relax, breathe in the soothing aroma, and let your stresses melt away.

After steaming, it’s time to nourish your skin. Apply a hydrating mask, focusing on areas that need a little extra love. This step provides intense hydration, replenishing your skin’s moisture levels and giving it a plump, youthful appearance. Sit back, relax, and let the mask work its wonders for about 10-15 minutes.

Step 4: Massage and Relaxation

Now it’s time to indulge in some self-massage. Using your fingertips, gently massage your face in upward circular motions. This promotes blood circulation, stimulates collagen production, and gives your facial muscles a much-needed workout. You can also use a facial oil or serum to provide an added boost of nourishment while massaging.

Step 5: Finishing Touches

To conclude your DIY facial, rinse off the mask thoroughly with lukewarm water. Pat your face dry and apply a lightweight moisturizer to lock in the benefits of your facial. Don’t forget to include your neck and décolletage in this step to maintain a consistent glow.

Conclusion

Congratulations! You’ve successfully achieved a fabulous DIY facial at home. By following these five simple steps, you’ve treated yourself to a relaxing and rejuvenating experience, all while saving time and money. Remember, self-care is essential, and taking the time to pamper yourself is a wonderful investment in your overall well-being.

If you’re looking to explore different facial kits, Smyten offers facial kit trial packs that allow you to sample a variety of high-quality products. So, go ahead and get your glow on, unleash your inner skincare enthusiast, and let your radiance shine through!


When it comes to personal style and self-expression, nails often take a back seat to hair, makeup, and fashion. However, a well-done manicure can be the cherry on top of a fabulous look, adding that extra touch of polish and sophistication. If you’re ready to elevate your nail game, there’s no better place to start than with a professional manicure in Gold Coast. So, why not dive into the world of nail artistry and discover how to unlock your nail potential?

In this blog post, we’ll explore the benefits of investing in a professional manicure, share tips for choosing the right salon, and offer some inspiration for your next visit to a Gold Coast nail artist.

The Benefits of a Professional Manicure in Gold Coast

While it may be tempting to save money by doing your nails at home, there are several advantages to investing in a professional manicure. Here are just a few reasons why you should consider treating yourself to a salon experience:

  • Expertise and precision: A professional nail technician has the skills and experience necessary to create intricate designs, apply flawless polish, and shape your nails to perfection. Plus, they have access to high-quality products and tools that can help your manicure last longer and look better.
  • Relaxation and pampering: There’s something undeniably luxurious about sitting back in a comfortable chair and having someone else take care of your nails. A professional manicure is an opportunity to indulge in some much-needed self-care and enjoy a bit of pampering.
  • Healthy nails and hands: Regular manicures can help maintain the health and strength of your nails, as well as keep your cuticles and hands moisturized. This is especially important if you have a habit of biting your nails or if your hands are frequently exposed to water or harsh chemicals.
  • A confidence boost: When your nails look good, it’s hard not to feel a little more put-together and confident. A professional manicure can help you make a great first impression, whether it’s at a job interview, a date, or a social event.

Tips for Choosing the Right Gold Coast Salon

Now that we’ve established the benefits of getting a professional manicure let’s discuss how to find the perfect salon for your needs. Here are some tips to help you make an informed decision:

  • Ask for recommendations: Word of mouth is often the best way to find a reliable and talented nail technician. Ask friends, family, or coworkers if they have any favourite salons or nail artists in the area.
  • Read online reviews: Websites like Google, Yelp, and Facebook offer customer reviews and ratings, giving you an idea of what to expect from a particular salon or manicure in Gold Coast. Look for patterns in feedback rather than focusing on isolated negative comments.
  • Check out portfolios: A professional nail artist should have a portfolio or social media profile showcasing their work. Browse through their photos to see if their style aligns with your preferences and if they can create the designs you’re interested in.
  • Consider the location and pricing: Make sure the salon is conveniently located and offers pricing that fits within your budget. Don’t forget to inquire about any additional fees for special services or add-ons.
  • Visit the salon: Before committing to a manicure, visit the salon in person to get a feel for the atmosphere, cleanliness, and customer service. Trust your instincts – if something doesn’t feel right, keep looking.

Nail Inspiration for Your Next Manicure in Gold Coast


Ready to take the plunge and book a professional manicure? Here are some popular nail trends and designs to consider for your next appointment:

  • Minimalist and geometric: Clean lines, simple shapes, and understated colours are perfect for those who prefer a more subtle and sophisticated look.
  • Bold and colourful: If you’re not afraid to make a statement, opt for vibrant hues, elaborate patterns, or eye-catching colour combinations.
  • Metallic and glitter accents: Add a touch of glamour to your nails with metallic polish, glitter, or foil accents.
  • Nail extensions and sculpting: For those looking to add length or change the shape of their nails, nail extensions or sculpting techniques can create a dramatic transformation.
  • Seasonal and themed designs: Celebrate holidays, special events, or your favourite hobbies with themed nail art that reflects your personality and interests.

Bottom line:

Now that you’re armed with all the information you need, it’s time to unlock your nail potential with a professional manicure in Gold Coast. With so many talented nail artists and salons to choose from, you’re sure to find the perfect fit for your style and needs. So go ahead, treat yourself, and watch as your nails become the envy of everyone around you!

In today’s world, where wearing masks has become a daily necessity, it can be challenging to maintain flawless makeup that stays intact throughout the day. Whether you’re attending an important meeting, going for a special event, or simply want to feel confident, having makeup that is mask-proof and transfer-resistant is crucial.

Fortunately, with a few handy tips and tricks, you can achieve long-lasting, smudge-free makeup even while wearing a mask.

In this article, we will explore five expert strategies that will help you achieve makeup perfection every time and guide you to buy makeup products online.

1. Prep and Prime Your Skin

Before applying any makeup, it is vital to properly prep and prime your skin. Start by cleansing your face with a gentle cleanser to remove any impurities or excess oil. Follow this with a hydrating moisturizer that suits your skin type. Properly moisturized skin acts as a smooth canvas for makeup application.

Once your moisturizer has fully absorbed, apply a primer. Primers not only create a smooth surface for makeup but also extend its wear time. Look for a primer that is specifically formulated to combat oiliness or control shine if you have oily skin. For dry skin, opt for a hydrating primer to prevent makeup from appearing cakey or flaky.

Opt for Long-Wearing and Waterproof Formulas

To ensure your makeup stands up to the mask, it’s essential to choose long-wearing and waterproof formulas. Look for products labeled as “long-wearing” or “transfer-resistant” as they are specifically designed to withstand external factors such as heat, humidity, and friction. These formulas are less likely to smudge or transfer onto your mask, giving you a fresh and flawless look all day.

When you buy makeup products online, select foundation and concealer, choose formulas that are oil-free and non-comedogenic. These products are less likely to clog your pores and cause breakouts. Additionally, opt for a setting powder that is finely milled to minimize the risk of caking or settling into fine lines.

3. Set Your Makeup with a Setting Spray

Setting sprays are a makeup artist’s secret weapon when it comes to making makeup last longer. After you have completed your makeup application, lightly mist a setting spray over your face. This will help to seal your makeup in place and prevent it from budging, even under a mask.

Look for a setting spray that offers long-lasting hold and is specifically designed for the purpose of setting makeup. Some setting sprays also offer additional benefits like oil control or a dewy finish, depending on your preference. A few spritzes of setting spray can make a world of difference in prolonging the wear time of your makeup.

4. Focus on Eyes and Brows

Since masks cover a significant portion of our face, it’s essential to emphasize the eyes and brows to draw attention. Well-groomed brows frame the face and can make a significant impact on your overall look. Use a brow pencil or powder to fill in any sparse areas and create a defined shape.

When it comes to eye makeup, opt for long-lasting and smudge-proof formulas. Waterproof mascara and eyeliner are your best friends for preventing smudges caused by rubbing or sweat.Consider using eyeshadow primers to prevent creasing and help your eyeshadow stay vibrant throughout the day. Experiment with different eyeshadow shades and techniques to create eye-catching looks that compliment your mask.

5. Blot and Touch Up Throughout the Day

Even with all the right products and techniques, some touch-ups may be necessary throughout the day. To combat excess oil or shine, keep blotting papers or oil-absorbing sheets in your purse. Gently blot your T-zone or any other areas prone to oiliness to freshen up your makeup.

Use the powder to set any areas that have become shiny, reapply lipstick to freshen up your pout, and make any necessary adjustments to your eye makeup. By being prepared, you can easily maintain a polished appearance even with a mask on.

Conclusion

Achieving mask-proof and transfer-resistant makeup doesn’t have to be a daunting task. By following these five expert tips and tricks, you can confidently step out with flawless makeup that stays intact throughout the day. Remember to properly prep and prime your skin, choose long-wearing and waterproof formulas, set your makeup with a setting spray, focus on the eyes and brows, and be prepared for touch-ups throughout the day. With a little effort and the right techniques, you can conquer any mask-related makeup challenges and rock a stunning look no matter the circumstances.